My backyard has always been a haven for birds, a vibrant tapestry of chirps, flutters, and fleeting glimpses of colorful feathers. But I wanted more. I craved a closer look, a deeper understanding of the avian drama unfolding just beyond my window. That’s when I decided to install a bird feeder camera. What started as a simple curiosity blossomed into a fascinating, albeit occasionally frustrating, journey filled with unexpected lessons.
Choosing the Right Camera: More Than Meets the Eye

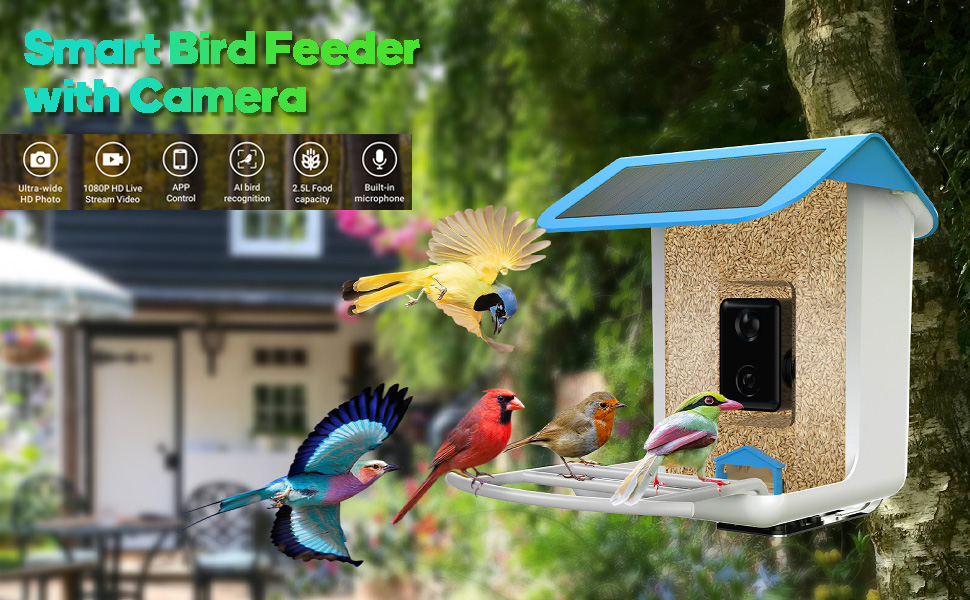
The market for bird feeder cameras is surprisingly diverse. Initially, I was overwhelmed by the sheer number of options, each boasting impressive features. My biggest mistake was focusing solely on resolution. While high definition is fantastic for capturing crisp images, other factors are just as crucial. Consider factors like:
- Night vision: Birds are most active at dawn and dusk. A good night vision capability is essential for capturing those magical moments. Infrared LEDs are your friend here.
- Range and connectivity: How far away is your feeder from your Wi-Fi router? Poor connectivity means dropped frames and missed opportunities. Check the manufacturer’s specifications carefully.
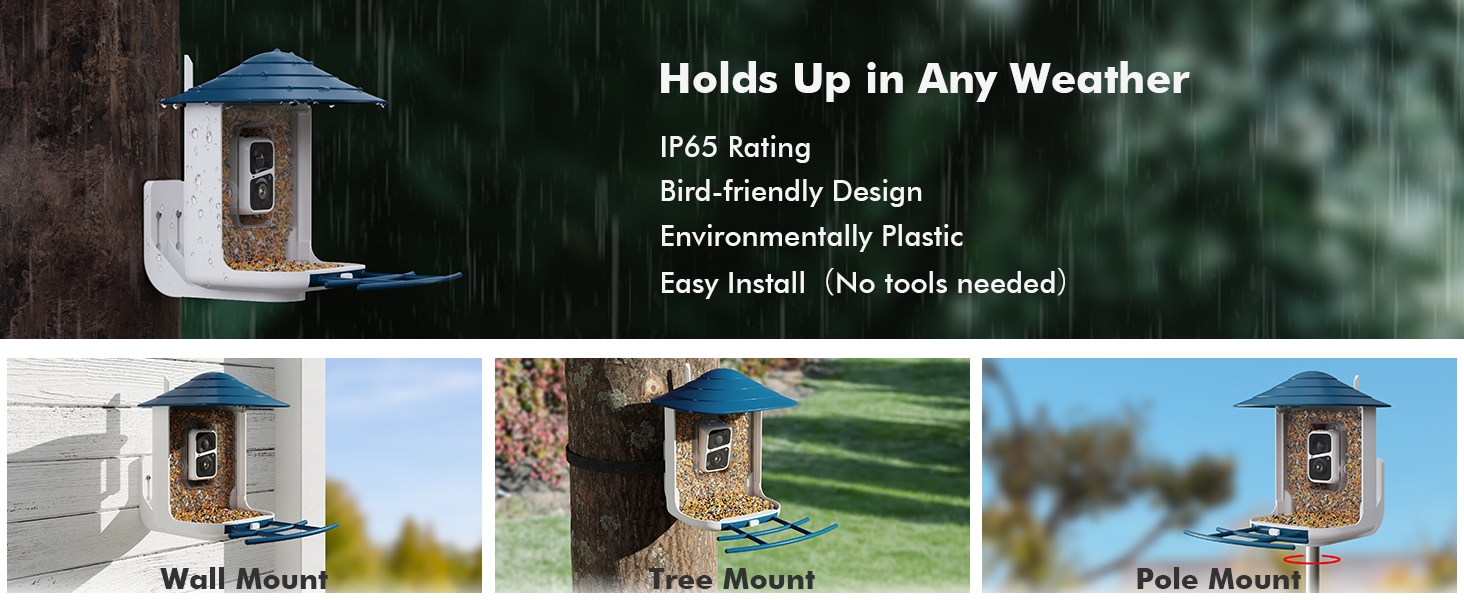
- Weatherproofing: Mother Nature is unpredictable. Your camera needs to withstand rain, snow, and extreme temperatures. Look for IP ratings to gauge weather resistance.
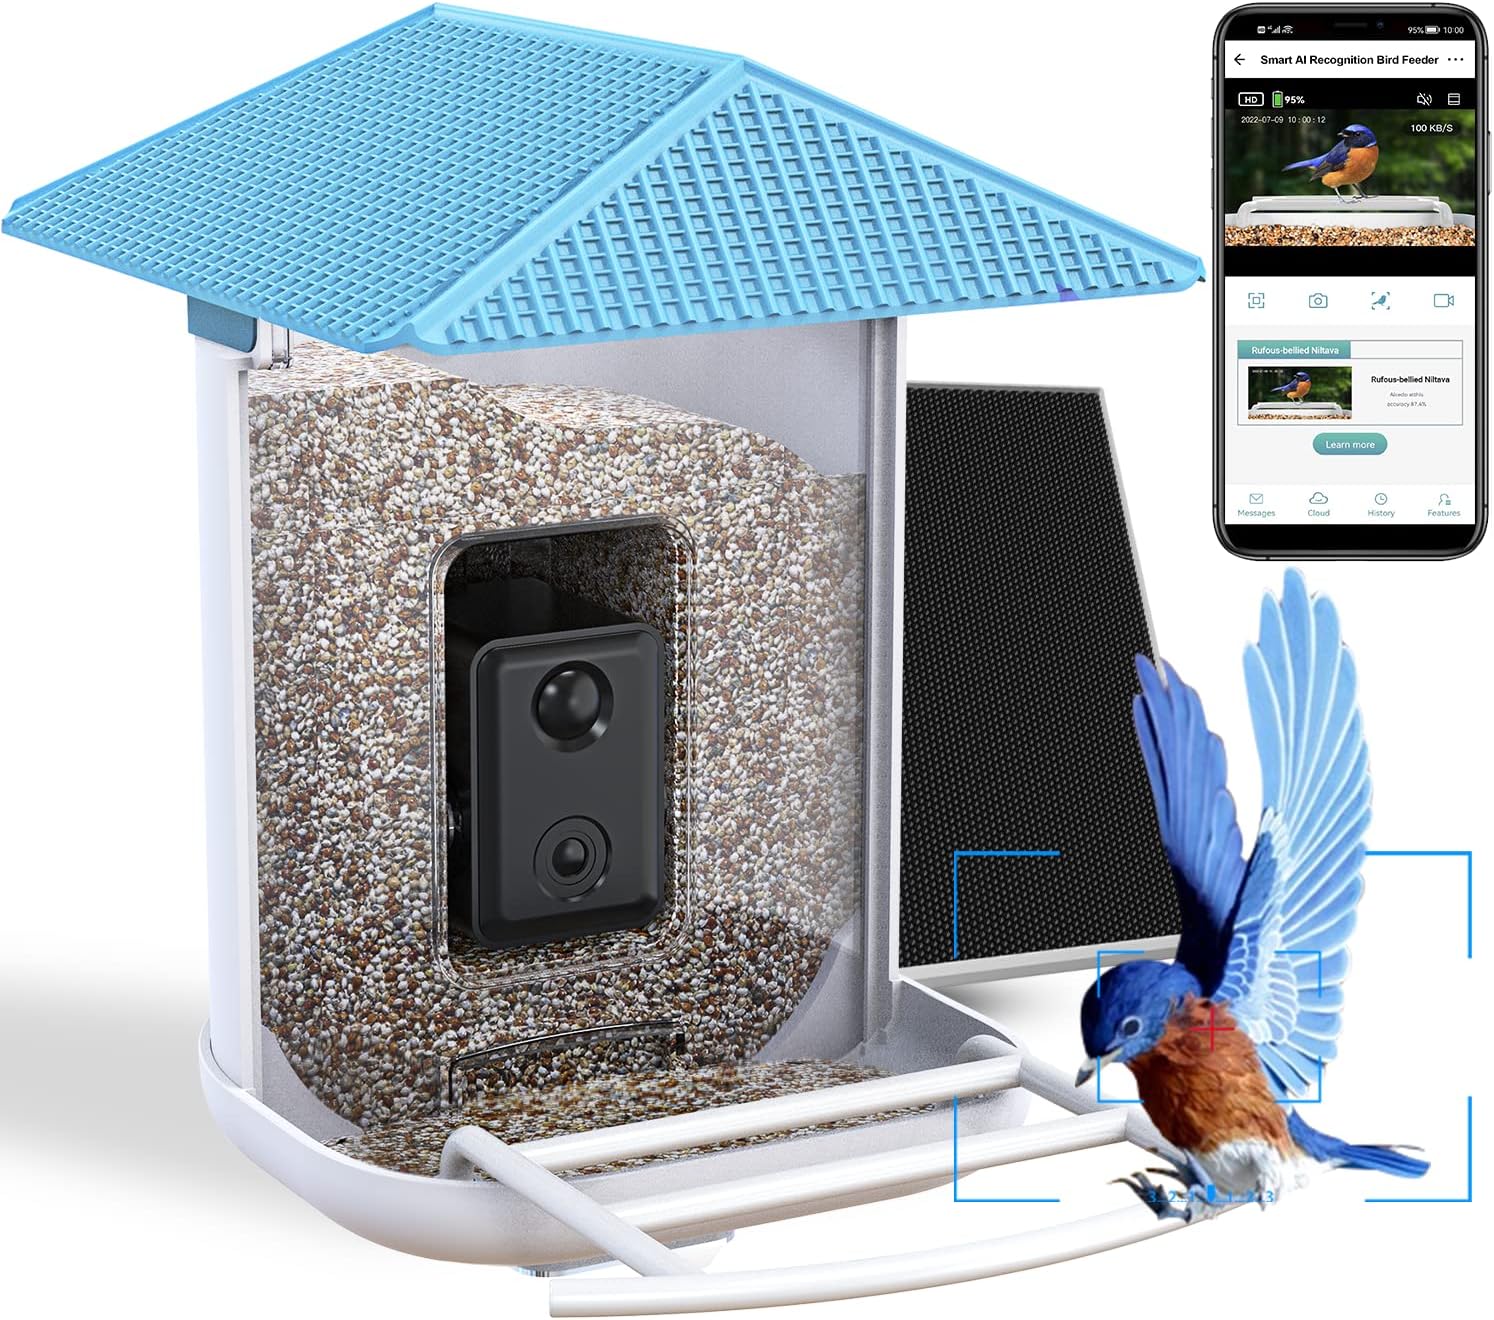
- Storage and access: Where will the footage be stored? Cloud storage offers convenience but can be expensive. Local storage via SD card provides more control but requires regular downloads.
- Motion detection: This feature is a game changer. It’ll alert you when activity occurs, saving you from sifting through hours of uneventful footage.
Installation: A Balancing Act
I opted for a model with a robust mounting system, and even then, securing the camera proved to be more challenging than I’d anticipated. The ideal placement offers a clear, unobstructed view of the feeder while remaining protected from the elements. I ended up experimenting with different locations before finding the sweet spot.
Remember to consider the height and angle. Too high and you might lose detail; too low and branches or foliage might obscure the view. A sturdy mount is vital, especially if you live in an area prone to strong winds. A poorly secured camera is not only useless but also potentially hazardous.
Powering the Camera: Solar or Mains?
My first setup used a mains-powered camera. It was reliable, but the wiring was somewhat unsightly. My second iteration involved a solar-powered option. This was a far more aesthetically pleasing solution, but it came with its own set of drawbacks. Solar panels can be less efficient in shaded areas or during periods of cloudy weather. This can lead to power outages and data loss unless you have a backup battery. Consider your climate and the amount of sunlight your location receives before making your decision.
The Unexpected Joys (and Frustrations) of Bird Watching
Once everything was set up, the fun began! The camera unveiled a hidden world of bird behavior I never knew existed. I witnessed fierce competition for prime feeding spots, intricate courtship rituals, and the surprising dexterity of even the smallest birds. It was absolutely mesmerizing.
However, there were moments of frustration too. Leaves obscuring the view, squirrels raiding the feeder, and dealing with poor weather conditions were just a few of the challenges. Regular maintenance, including cleaning the lens and adjusting the camera’s position, became an essential part of the experience.
Lessons Learned: Beyond the Pretty Pictures
My journey with the bird feeder camera wasn’t just about capturing beautiful images; it taught me valuable lessons about patience, observation, and the importance of understanding the nuances of technology. I learned that:
- Planning is essential: Consider your location, power options, and connectivity before making a purchase.
- Read the manual (seriously): This might sound obvious, but it’s easy to skip this step. The manual holds crucial information about setup, maintenance, and troubleshooting.
- Experimentation is key: Finding the perfect camera placement might take some trial and error.
- Regular maintenance is crucial: Keeping the lens clean and checking the power supply regularly will ensure optimal performance.
- Embrace the unexpected: Things don’t always go as planned. Be prepared for challenges and enjoy the learning process.
Ultimately, my experience with a bird feeder camera has been overwhelmingly positive. The ability to observe nature up close and personal has enriched my understanding of the natural world. If you’re considering embarking on this adventure, don’t be afraid to dive in. The rewards far outweigh the occasional frustration.